Category: Uncategorized

  • How to Clean a Charging Port Safely

    How to Clean a Charging Port Safely

    Your phone may not need a new battery or a new charger. Sometimes the cable will not click into place because the charging port is packed with pocket lint. A clean charging port can fix loose connections, slow charging, and the frustrating cycle of plugging in your phone only to see it stop charging a few minutes later.

    The key is to clean it carefully. Charging ports contain small internal pins that can bend, break, or corrode. A quick fix with the wrong tool can turn a simple lint problem into a repair. Start with the safest steps, then know when it is time to stop and bring the device in.

    Signs Your Charging Port Needs Attention

    Look at how your charging cable fits. A healthy cable should slide in firmly and sit securely. If it feels loose, falls out with a small bump, or only charges when held at a certain angle, debris may be blocking the connector from seating all the way.

    Other common signs include intermittent charging, a phone that charges very slowly with a known-good cable, or a charging notification that comes and goes when you move the device. Lint is especially common on phones that spend a lot of time in jeans pockets, purses, backpacks, cars, or work environments with dust and debris.

    Still, lint is not the only possibility. The cable may be worn, the charging block may be failing, the battery may have a problem, or the port itself may be damaged. Cleaning is a sensible first check, not a guarantee that every charging issue will disappear.

    How to Clean a Charging Port Safely

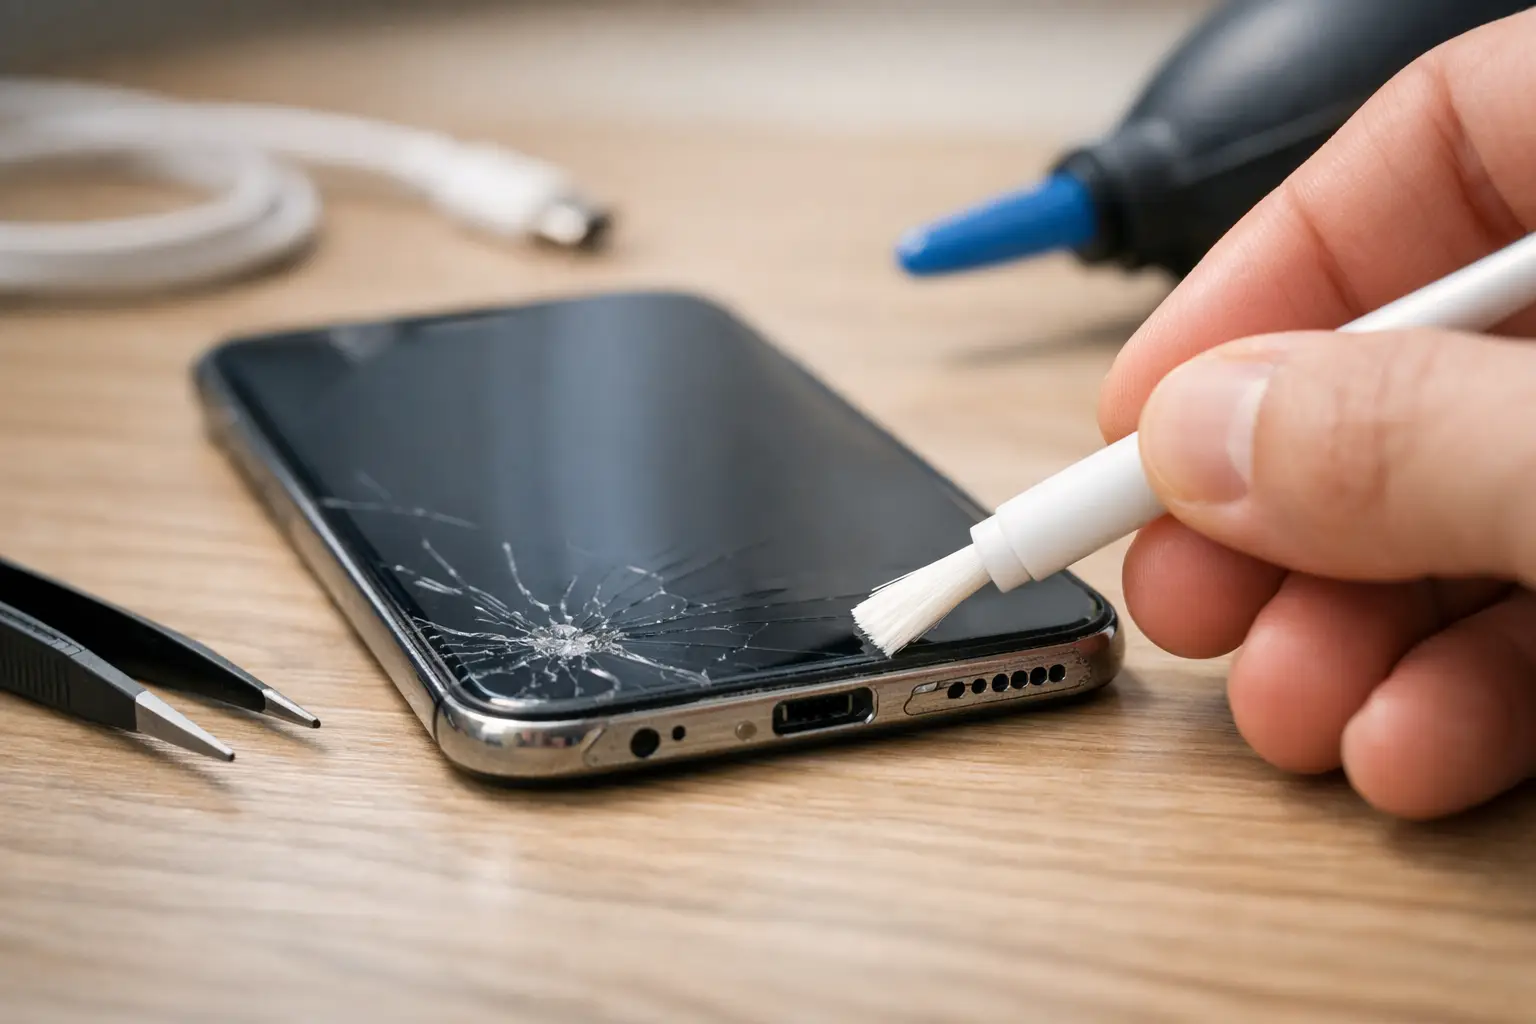
    First, turn the device completely off. Disconnect the charging cable and remove any case that makes it hard to inspect the bottom of the phone. Use a bright light and look directly into the port. You may see a compact layer of gray, black, or tan material at the bottom. That is often lint compressed by repeated cable insertions.

    Use a dry, nonmetal tool with a fine tip, such as a plastic dental pick, a nylon electronics-cleaning tool, or a wooden toothpick trimmed to fit carefully. Work slowly around the inside edges of the port. The goal is to lift loose debris out, not scrape hard against the center contacts.

    Keep the phone angled downward while you work so debris can fall out instead of being pushed farther inside. Make a few gentle passes, then tap the phone lightly against your hand and inspect the port again. It can take more than one attempt because lint is often packed tightly at the back.

    Once the port looks clear, reconnect your cable. It should insert more fully and feel more secure. If it still will not seat correctly, do not force it. Forcing a cable into a blocked or damaged port can make the problem worse.

    What Not to Use

    Avoid anything metal, including paper clips, sewing needles, safety pins, tweezers, and knife tips. Metal can scratch the port, bend the connector pins, and create an electrical short if the device is not fully powered down.

    Do not pour liquid, household cleaner, or rubbing alcohol directly into the port. Moisture and electronics are a bad combination, and liquids can move debris deeper into the device. Compressed air can also be risky when used too close or too forcefully because it may push lint inward or introduce condensation.

    A cotton swab is usually too large for a phone port. Cutting one down can leave cotton fibers behind, creating a second blockage. When in doubt, use a purpose-made nonmetal tool or leave the cleaning to a repair technician.

    Check the Charger Before Blaming the Port

    A clean-looking port does not automatically mean the port is the issue. Test your phone with another charging cable and wall adapter that you know work properly. Cables often fail near the connector ends, especially if they have been bent, pulled, or used in a vehicle every day.

    Try a different power outlet too. If the phone charges normally with another cable, replace the cable instead of attempting more cleaning. If it charges with wireless charging but not with a wired cable, that points more strongly to the port, although the cable and adapter should still be ruled out first.

    For USB-C devices, inspect both sides of the cable connector. Dirt, bent metal, discoloration, or a loose connector can create the same symptoms as a blocked phone port. For Lightning devices, check for black marks, corrosion, or visible wear on the connector tip.

    When Cleaning Will Not Solve the Problem

    Stop trying to clean the port if you see bent pins, a broken piece of cable inside, green or white corrosion, burn marks, or moisture. Those signs call for professional inspection. Continuing to poke around can damage components that are much more difficult to replace.

    A repair is also likely needed if the phone only charges at a very specific angle after debris has been removed. That can indicate worn or damaged contacts inside the port. The same goes for a device that gets hot while charging, repeatedly shows a moisture warning, shuts off when connected to power, or does not recognize any charger at all.

    Water exposure changes the situation. Even if the phone seems dry on the outside, moisture can cause corrosion inside the charging assembly over time. Do not plug in a wet device to test it. Power it off if possible, let it dry in a ventilated area, and have it checked if there is any concern about liquid damage.

    A Few Habits That Keep the Port Clear

    Charging-port lint builds up slowly, so prevention is mostly about where the phone lives. Keep your phone out of loose, dirty pockets when possible, and avoid leaving the port exposed on dusty surfaces. If you work around construction dust, food particles, pet hair, or debris, a protective case with a port cover may be worth considering.

    Do not pull the cable out by yanking the cord. Grip the connector instead. This reduces wear on both the cable and the internal port contacts. It also helps to use a charger that fits correctly. A loose, off-brand, or damaged connector can wear down the port faster than normal use.

    You do not need to clean the port every week. Check it when the cable begins to feel less secure or charging becomes inconsistent. Cleaning too often or too aggressively creates more risk than benefit.

    Get Help for a Charging Problem That Will Not Quit

    If you have carefully removed visible debris, tested another cable and adapter, and your device still will not charge reliably, the issue may be more than a dirty port. A technician can inspect the connector, test charging behavior, check for battery or power issues, and determine whether the port needs cleaning, repair, or replacement.

    For Richmond customers, Excell Wireless VA can help troubleshoot charging problems across many phone brands and personal devices. Bring the device and the charger you normally use so the issue can be tested under the same conditions that caused the problem.

    Your phone should not require a perfect cable angle, constant unplugging, or a daily fight to stay charged. If a careful cleaning does not restore a firm connection, getting it checked early can prevent a small charging issue from becoming a device you cannot use when you need it most.
  • Phone Insurance Versus Repair: Which Costs Less?

    Phone Insurance Versus Repair: Which Costs Less?

    A cracked screen at 8 a.m. can turn into a costly decision by lunch. When you compare phone insurance versus repair, the cheapest option is not always the one with the lowest price on paper. It depends on what is broken, what your plan actually covers, how much you have already paid in premiums, and how quickly you need your phone back.

    For many Richmond phone owners, a local repair is the faster answer for common damage. Insurance can make more sense when a phone is lost, stolen, or severely damaged. The key is knowing the difference before you file a claim or spend money you did not need to spend.

    What Phone Insurance Usually Covers

    Phone insurance is a monthly protection plan offered through a carrier, manufacturer, credit card, or third-party provider. It may cover accidental damage, liquid damage, loss, theft, or mechanical failure after the manufacturer warranty ends. Coverage varies widely, so the plan name alone does not tell you much.

    Most plans come with three costs: the monthly premium, a deductible when you make a claim, and possible service or replacement fees. A $12 monthly plan may not feel expensive, but it adds up to $144 over a year. If a replacement claim also requires a $99 or $199 deductible, you may have paid a substantial amount before receiving a device.

    There can also be limits that catch people off guard. Your plan may allow only a certain number of claims each year. A lost-phone claim may cost more than a screen-damage claim. Some plans send a replacement by mail instead of repairing your exact device. That replacement could be new, refurbished, or a similar model based on availability.

    Insurance is not automatically a bad deal. It is protection against high-cost problems. If you carry a newer flagship phone and could not easily replace it after theft, a plan may provide useful peace of mind. Just do not assume every problem requires an insurance claim.

    When Paying for Repair Makes More Sense

    A repair is often the practical choice when the issue is specific and fixable. Broken screens, weak batteries, charging port problems, damaged cameras, speaker issues, and many power problems can be diagnosed without opening an insurance claim.

    The biggest advantage is simple: you pay for the problem in front of you. There is no monthly premium to consider, no claim history, and usually no need to wait for approval or shipment. A technician can inspect the device, explain the issue, and provide a quote based on the repair needed.

    Repair can also help you keep your own phone. That matters when your device contains work apps, banking access, photos, saved passwords, and settings you do not want to transfer in a rush. Even with a proper backup, setting up a replacement phone takes time. Keeping the phone you know can be more convenient than receiving another device in the mail.

    A local repair is especially worth considering when the insurance deductible is close to or higher than the repair quote. For example, if your plan charges a $99 deductible for screen damage and the screen repair costs less than that, filing a claim may not be the best use of your coverage.

    Phone Insurance Versus Repair: Compare the Real Cost

    Do not compare only the deductible to the repair price. Compare the full cost of ownership.

    Start with the money already going toward insurance. If you have paid $15 each month for two years, that is $360 in premiums. You cannot get that money back, but it helps show whether the plan has delivered value for your situation. Then add the deductible for this claim and any shipping, upgrade, or activation costs that may apply.

    Next, get a repair quote. A quote gives you a direct number for fixing the issue without replacing the entire phone. If the phone has a cracked screen but works normally, repairing that screen may cost less than an insurance claim and keep your day moving.

    There is another cost people forget: downtime. If you use your phone for work, delivery apps, customer calls, school, family coordination, or two-factor login codes, several days without it can create a bigger problem than a repair bill. A nearby repair shop may be able to troubleshoot the issue faster than a mail-in claim process.

    That said, repair is not always the right choice. If a phone has extensive water damage, a bent frame, severe motherboard damage, or multiple major failures, the repair cost may approach the value of the device. In that case, an insurance replacement or a new phone may be more sensible.

    Ask These Questions Before You File a Claim

    Before you use insurance, take a minute to look at the details. First, ask whether the damage is covered. Cosmetic damage, normal battery wear, and certain software issues may not qualify. Then check your deductible, claim limit, and the expected replacement timeline.

    Also ask what you will receive. Will the insurer repair your phone, replace it, or send a refurbished device? Will your color, storage size, and model be available? If the replacement is not identical, make sure it still meets your needs.

    Finally, ask whether the issue could be repaired locally for less. A phone that will not charge might have debris in the port, a worn charging port, a failing cable, or battery trouble. Those are different problems with different solutions. A diagnosis can prevent you from using an expensive claim for a problem that has a straightforward fix.

    Your Phone’s Age Changes the Decision

    Insurance tends to be more valuable for expensive, newer phones. Replacing a recent premium device out of pocket can hurt, especially after loss or theft. If the deductible is reasonable, insurance may protect you from a much larger replacement cost.

    For an older phone, the math changes. A high deductible does not make much sense if the device is worth only a little more than the claim cost. It may be better to repair a single issue, put the money toward an upgrade, or replace the phone without paying for an insurance plan you no longer need.

    Battery health is a good example. If an otherwise reliable phone is two or three years old and needs a battery, repair may extend its useful life at a far lower cost than replacing the device. But if it also has a broken screen, failing cameras, and random shutdowns, putting more money into it may not be wise.

    Speed, Convenience, and Your Data Matter Too

    Insurance is designed for coverage. Repair is designed to solve a device problem. That difference affects the customer experience.

    With an insurance claim, you may need to verify your account, submit details about the damage, pay a deductible, back up your data, and wait for instructions or a replacement. That process can be worthwhile for a major loss. It can feel excessive for a cracked screen or a charging issue.

    With repair, the first step is usually simpler: explain what the phone is doing and have it checked. A good technician will not promise a fix before understanding the issue. They should identify the likely cause, discuss the available options, and give you a clear quote before work begins.

    Back up your phone whenever possible, no matter which route you choose. Insurance replacements and certain repairs can require a reset, and data recovery is never guaranteed. Save important photos, contacts, messages, and authentication information before the device gets worse.

    A Simple Rule for Choosing

    Use insurance when the phone is lost, stolen, or damaged beyond a reasonably priced repair, especially if it is a newer high-value device. Consider repair first when the damage is limited, the phone is otherwise working well, and the repair quote is lower than your deductible or the hassle of a claim.

    If you are unsure, do not guess based on a cracked screen or a phone that will not turn on. Get the issue checked and compare the quote with your coverage. At Excell Wireless VA, the practical next step is simple: bring in the device or describe the problem for a quote. You will have a better decision once you know what is actually wrong and what it will take to fix it.

  • How Long Phone Repair Takes for Common Problems

    How Long Phone Repair Takes for Common Problems

    A cracked screen before work, a phone that will not charge at lunch, or a device that died after getting wet can put your whole day on hold. If you are asking how long phone repair takes, the honest answer is that it depends on the problem, the phone model, part availability, and what the technician finds after checking the device.

    Many common repairs can be completed the same day. Others need more time because the issue is deeper than it first appears. A local repair shop can usually give you a clearer timeline once the phone is inspected and the correct part is confirmed.

    How Long Does Phone Repair Take?

    For straightforward issues, phone repair may take anywhere from 30 minutes to a few hours. Screen replacements, battery replacements, and some charging port repairs are often completed on the same day when the needed part is available.

    More complicated problems can take a day or longer. Water damage, motherboard issues, repeated restarting, data recovery concerns, and problems caused by a previous repair may require careful testing before anyone can promise a completion time.

    The fastest way to get a real answer is to describe the issue, share your phone model, and bring the device in for an inspection. A quote and timeline should be based on the actual condition of your phone, not a guess over the phone.

    Typical Repair Times for Common Phone Problems

    Cracked or broken screen

    A screen replacement is one of the most common phone repairs. If the display is cracked but the phone still powers on and the replacement screen is in stock, the repair may take about 30 minutes to two hours.

    A badly damaged phone can take longer. If the frame is bent, the touchscreen is not responding, the display has black spots, or the device has damage beyond the glass, the technician may need to check for additional issues. Newer phones with fingerprint sensors, face recognition components, curved displays, or tightly sealed frames can also require more careful work.

    Do not wait too long with a cracked screen if glass is loose or the display is exposed. Small cracks can allow moisture and dust inside the phone, turning a simple screen repair into a larger problem.

    Battery replacement

    Most battery replacements are same-day repairs when the correct battery is available. In many cases, the work itself can be completed in one to two hours.

    Your phone may need a battery if it drains unusually fast, shuts off at random, gets hot during normal use, or only works when connected to a charger. However, those symptoms do not always point to the battery. A charging issue, software problem, damaged charging port, or power-related board problem can create similar signs. Testing the device first helps avoid replacing a part that is not actually the cause.

    If the battery is swollen, stop using the phone and do not keep charging it. A swollen battery can push against the screen or back cover and needs prompt attention.

    Charging port repair

    Charging problems can sometimes be resolved quickly, but the timeline depends on why the phone is not charging. Lint packed into the port may be removed during a cleaning and inspection. A damaged port that needs replacement may take a few hours, depending on the phone and part availability.

    Before assuming the port has failed, try another known-good cable and wall adapter. If several chargers do not work, the cable will not fit securely, or the phone only charges at a certain angle, the port may need service. Wireless charging failing at the same time can point to a different issue, which is why diagnosis matters.

    Camera, speaker, microphone, or button repair

    Repairs to cameras, speakers, microphones, and buttons are often completed the same day if the part is available. The repair may take one to several hours depending on how far the phone must be opened and whether the damaged component is connected to other parts.

    For example, muffled sound may be caused by debris in a speaker grill, while no sound at all can be related to the speaker, software settings, water exposure, or internal damage. A quick check can separate a simple fix from a repair that needs replacement parts.

    Water damage repair

    Water damage does not follow a reliable clock. A phone may stop working immediately, continue working for several hours, or appear fine before corrosion causes a problem days later. That is why water-damaged phones usually need more than a quick visual check.

    Inspection and cleaning may take a day or more, especially if the device needs to be opened, dried properly, tested, and checked for damaged components. If data is important, let the repair technician know before work begins. The best repair path may be different when photos, contacts, business files, or other information need to be protected.

    If your phone gets wet, turn it off if possible. Do not keep plugging it in to see whether it works, and do not use rice. Rice does not remove moisture from inside the phone and can leave dust where it does not belong. Bring it in as soon as you can.

    Software and performance problems

    A phone that freezes, restarts, runs slowly, will not update, or shows storage errors may need software troubleshooting rather than a physical part replacement. Some software issues can be resolved the same day. Others take longer because the device needs updates, backups, resets, or testing after the work is done.

    Bring your passcode if you are comfortable providing it for testing, and know your account login information before a reset is considered. Back up your phone if it still turns on and you can access it. A reset can fix certain software problems, but it can also erase data if there is no backup.

    What Can Make a Repair Take Longer?

    The repair itself is only one part of the timeline. Part availability matters, especially for less common models, older phones, newer releases, foldable devices, and phones with unusual colors or storage versions. If a part needs to be ordered, the repair will take longer than a same-day service with a part already in stock.

    The original damage also matters. A phone dropped face-down may have a cracked screen, but it may also have frame damage, a weak battery connection, a damaged camera, or touch issues that become clear only after the screen is removed. A good technician checks the device before and after repair rather than rushing through one visible problem.

    Security features can affect timing too. Some devices require software calibration, fingerprint testing, camera testing, or other verification after a part is installed. That extra time is worth it because the goal is not simply to replace a part. The goal is to return a phone that works properly.

    Shop workload can also affect turnaround. If you need your device back quickly, ask about the current repair queue when requesting a quote. A direct answer about timing is more useful than a vague promise.

    How to Get Your Phone Repaired Faster

    A little preparation can prevent delays. Bring the phone, any charger that may be involved in the problem, and a clear description of what happened. Mention whether it was dropped, exposed to water, repaired before, or showing an error message. Those details help narrow down the issue faster.

    If possible, back up your data before service. Remove your case and accessories if they make it difficult to inspect the device. If you have a screen lock, be ready to unlock the phone for functional testing or discuss another option with the shop.

    It also helps to be specific about your priority. If you need the phone for work, need data recovered, or are deciding whether repair makes sense compared with replacement, say so upfront. The right recommendation may not always be the fastest repair, but it should be the one that makes the most sense for your device and budget.

    For Richmond customers dealing with a broken phone, Excell Wireless VA can inspect the issue, explain the repair options, and provide a practical timeline based on your specific device. Call, request a quote, or visit the shop with the phone in hand. The sooner the problem is checked, the sooner you can get back to calls, messages, work, and everything else your phone handles.

  • Repair a Phone Overheating Issue Before It Worsens

    Repair a Phone Overheating Issue Before It Worsens

    A phone that gets hot enough to make you put it down is not just annoying. It can drain the battery faster, slow down performance, damage internal parts, and leave you without the device you rely on all day. To repair a phone overheating issue, start by stopping the heat source, then look for the pattern behind it. Sometimes the fix is simple. Other times, the phone needs a battery, charging port, or internal repair before the problem gets worse.

    When Phone Heat Is Normal and When It Is Not

    Most phones get warm during demanding tasks. Video calls, GPS navigation, gaming, streaming, hotspot use, and fast charging all make the processor and battery work harder. A little warmth during those activities is normal, especially if the phone is inside a thick case or sitting in direct sunlight.

    The concern starts when the phone stays hot after you stop using it, gets hot while sitting idle, shuts down unexpectedly, displays a temperature warning, or becomes uncomfortable to hold. Heat that appears every time you charge the phone is also a sign worth taking seriously. Repeated overheating puts extra strain on the battery and can turn a small issue into a no-power problem.

    If you smell anything unusual, see a lifted screen, notice a bulging back cover, or find that the battery is swelling, stop using and charging the device. A swollen battery needs professional attention. Do not press the screen back down, puncture the battery, or try to take the phone apart at home.

    What to Do Right Away

    First, unplug the phone if it is charging. Remove the case, turn the screen off, and move the device away from sun, car dashboards, blankets, pillows, or other surfaces that trap heat. If it is very hot, power it off and let it cool naturally on a hard, dry surface.

    Do not put a hot phone in a refrigerator or freezer. Fast temperature changes can create moisture inside the device, which may cause more damage than the original heat problem. Letting it cool at room temperature is slower, but safer.

    Once the phone has cooled, restart it before using it again. A restart can stop a stuck app or background process that is forcing the processor to run continuously. If the phone heats up immediately after restarting, even when you are not using it, that points to a deeper battery, software, or hardware issue.

    Check Charging Equipment Before You Blame the Phone

    A bad cable, damaged charging brick, or loose charging port can cause heat during charging. Look closely at the cable for bent ends, exposed wires, discoloration, or a connector that feels loose. Replace damaged accessories rather than continuing to use them.

    Try a known-good charging cable and wall adapter that match your phone’s charging requirements. Cheap or worn-out accessories can deliver inconsistent power. That can make the phone work harder to charge, create excess heat, and eventually damage the charging system.

    Also check the charging port. Pocket lint and debris can keep the cable from seating correctly, leading to intermittent charging and heat. Do not dig into the port with metal tools. A repair technician can safely inspect and clean the port if the connection feels loose or the phone only charges at certain angles.

    Watch for Heat During Wireless Charging

    Wireless charging naturally produces more heat than a wired connection because power is transferred through the charging pad instead of directly through a cable. A slightly warm phone may be normal. A phone that becomes very hot, repeatedly disconnects, or stops charging is not.

    Remove thick cases, magnetic attachments, cards, and metal accessories before using a wireless charger. Make sure the phone is centered on the pad. If the issue happens only with wireless charging, try a wired charger. If it happens with both, the battery or charging hardware may need inspection.

    Find the App or Setting Causing the Heat

    If overheating began after installing an app, updating your phone, or changing a setting, the cause may be software. Check battery usage in your phone settings to see which apps are using the most power. Social media apps, navigation apps, games, video apps, and apps that constantly access location services are common sources of battery drain and heat.

    Close apps you are not using, update the apps that use the most battery, and delete any app that seems suspicious or continues running heavily in the background. Turning down screen brightness, disabling Bluetooth when you do not need it, and limiting background refresh can reduce heat while you troubleshoot.

    Software updates can help, but timing matters. If the phone is already hot, cool it down before installing anything. Keep the phone connected to reliable Wi-Fi, make sure there is enough storage available, and back up important data when possible. A failed update or nearly full storage can create performance problems that feel like an overheating issue.

    If the heat started immediately after an update and persists for more than a day or two, a technician can help determine whether the phone needs a software reset, data backup, or hardware diagnosis. Resetting a phone without a backup can create a different emergency, especially if you need photos, messages, banking access, or work files.

    Environmental Heat Can Push a Phone Over the Edge

    Richmond summers can be tough on phones left in a car, used outside, or mounted on a dashboard for navigation. Direct sun heats the phone from the outside while GPS, cellular data, and a bright screen create heat from the inside. That combination can trigger a temperature warning fast.

    Keep the phone out of direct sun when possible. For navigation, place it near an air vent but do not block the vent or let cold air blow directly onto a wet device. If you need GPS for a long trip, lower the screen brightness, close other apps, and use a wired charger only if the phone is not already overheating.

    Poor cell service can also cause heat. When your phone struggles to hold a signal, it uses more power searching for a connection. In a low-signal area, switching to airplane mode temporarily or connecting to Wi-Fi can reduce battery drain.

    When You Need Professional Phone Overheating Repair

    A phone that overheats once after a long gaming session may just need a break. A phone that overheats every day, gets hot while charging, loses battery quickly, shuts off at random, or has a swollen battery needs more than a settings change.

    The underlying problem may be an aging battery, liquid damage, a failing charging port, a damaged charging circuit, or an internal component drawing too much power. These issues cannot be confirmed by looking at the outside of the phone. A proper diagnosis checks how the device charges, how the battery performs, and whether heat is coming from a specific internal area.

    This is especially important after a drop or water exposure. A phone can appear to work normally at first, then develop heat, charging, or battery problems days later. Continuing to charge it heavily can make the damage spread.

    For customers in Richmond, Excell Wireless VA can inspect overheating phones and help identify the practical next step. Bring the phone in with its charging cable if the heat happens during charging. Tell the technician when the overheating started, what you were doing when it happened, and whether the device has been dropped, exposed to water, or repaired before. Those details can speed up the diagnosis.

    Protect the Battery After the Repair

    Once the issue is fixed, a few habits can help the battery last longer. Avoid charging under pillows or blankets, do not leave the phone in a hot car, and replace worn cables instead of bending or taping them. Use a case that does not trap excessive heat during heavy use, and give the phone a break if it becomes warm during games, video calls, or navigation.

    Your phone should be a tool you can count on, not something you have to watch for temperature warnings. If the heat keeps returning after basic troubleshooting, get it checked before a weak battery or charging problem leaves you with a phone that will not turn on.

  • How to Fix Water Damage on Your Phone Safely

    How to Fix Water Damage on Your Phone Safely

    A phone dropped in a sink, spilled on at lunch, or left out in the rain can go from normal to unusable fast. If you need to fix water damage, the first few minutes matter more than any drying trick you find online. Your goal is simple: stop power from moving through wet components, avoid making the damage worse, and get the device checked before corrosion spreads.

    What to Do First After Your Phone Gets Wet

    Turn the phone off immediately. Do not test the screen, press buttons repeatedly, connect a charger, or wait to see whether it keeps working. Electricity and moisture are a bad combination inside a phone, tablet, smartwatch, or other personal device.

    If the device is plugged in, unplug the charging cable from the wall and the device. Remove the case, SIM card tray, memory card, stylus, and any accessories that can come off without forcing them. Gently wipe the outside with a clean, dry, lint-free cloth.

    Hold the device with charging ports and openings facing down so excess water can drain out. Do not shake it hard. Shaking can push moisture farther into the phone, including under the display, into speakers, and around the charging port.

    If the phone was exposed to salt water, pool water, soda, coffee, or another liquid besides clean water, treat it as more urgent. Minerals, sugar, chlorine, and salt leave residue behind. Even when the phone appears dry, that residue can corrode internal connections over time.

    Do Not Use Rice to Fix Water Damage

    Rice is one of the most common responses to a wet phone, but it is not a reliable repair method. It does not remove liquid trapped under shields, connectors, cameras, or the battery. Rice dust can also get into charging ports and speaker openings.

    Avoid a hair dryer, oven, microwave, radiator, or direct sunlight too. High heat can damage batteries, warp internal adhesives, affect the display, and push moisture deeper into the device. Compressed air is also risky because it can force water into places it had not reached before.

    A fan in a cool, dry room can help with surface moisture after you have powered the device off. Still, airflow is not the same as internal cleaning. A phone may look dry on the outside while moisture continues causing problems beneath the screen or on the logic board.

    Check the Type of Device and Water Exposure

    Not every water incident has the same risk. A quick splash on a newer water-resistant phone is different from a fully submerged older phone. Water resistance is helpful, but it is not a guarantee. Seals wear down with age, drops, screen repairs, heat, and regular use.

    The amount of time underwater matters. So does where the liquid entered. A wet charging port may cause charging problems, while water entering through a cracked screen or back glass can affect the display, cameras, microphones, battery, and internal board.

    Pay attention to warning signs after the device dries. These include a dim or flickering screen, foggy camera lenses, distorted speakers, a muffled microphone, random restarts, no charging, overheating, or a battery that drains unusually fast. A device that works today can still fail days later if corrosion is developing inside.

    If the Device Will Not Turn On

    Do not keep trying to power it on. Repeated attempts can create a short circuit if moisture is still present. Leave it powered off and avoid charging it. This is the point where professional inspection is usually the safest move, especially if you need the phone for work, school, banking, or family communication.

    If the Device Still Works

    Back up important data only if the phone is stable, cool to the touch, and functioning normally. Use a wireless backup if available instead of connecting a cable to a potentially wet charging port. Then power it down again. A working phone is not proof that there is no internal damage.

    When a Professional Water Damage Repair Makes Sense

    A repair shop can open the device, inspect internal moisture indicators, clean affected areas, and test components that may have been damaged. The right repair depends on what water reached and how long it sat inside the device.

    Sometimes the solution is straightforward, such as cleaning a charging port, replacing a damaged battery, or repairing a speaker. Other cases require screen replacement, camera replacement, charging port repair, or board-level work. There are situations where repair may not be cost-effective, particularly when corrosion has damaged multiple internal components. A good inspection gives you a clearer answer before you spend money on the wrong fix.

    The sooner the device is checked, the better the chances of limiting corrosion. Waiting several days because the phone seems mostly fine can turn a repairable issue into a larger one. This is especially true after exposure to salt water, drinks, or moisture that entered through existing cracks.

    For Richmond customers, Excell Wireless VA can assess water-exposed phones and other personal electronics and help determine the practical next step. Bring the device in powered off when possible, and explain what liquid it contacted, how long it was exposed, and whether it was charging at the time.

    Protect Your Data Before and After Repair

    Water damage is not only a hardware problem. Your photos, contacts, messages, authenticator apps, work files, and account access may all be on that device. If it still turns on safely, make a backup as soon as possible without charging or stressing the phone.

    If the phone cannot power on, tell the technician if data recovery is a priority. The repair approach may be different when the goal is retrieving important information rather than restoring the phone for long-term use. Do not factory reset a water-damaged phone unless you are certain your data is backed up. A reset will not remove moisture or corrosion, and it can make recovery harder.

    After the device is repaired, check your backup settings. Make sure photos, contacts, and important files are syncing regularly. It is also smart to review saved passwords and two-factor authentication options, especially if the device was unreliable for several days.

    Watch for Battery Problems

    Water exposure can affect a phone battery, and battery issues should be taken seriously. Stop using the device if it gets hot, smells unusual, swells, separates from the screen or back cover, or loses power unexpectedly. Do not try to charge a swollen or overheating phone.

    Place the device on a nonflammable surface away from bedding, paper, vehicles, and direct heat. Bring it in for service rather than keeping it in a pocket or bag. A damaged lithium-ion battery is not a DIY repair.

    How to Lower the Risk Next Time

    A protective case can help with drops, but it does not make a phone waterproof. Keep devices away from sink edges, pool ledges, wet countertops, and open drink containers. If you work outdoors, travel in bad weather, or spend time around water, use a waterproof pouch made for electronics.

    Cracked screens and loose back glass should be repaired sooner rather than later. Those openings give moisture an easier path inside, even during light rain or a small spill. Also, let charging ports dry completely before connecting a cable. If your phone displays a moisture warning, do not override it by forcing a charge.

    The best way to fix water damage is to act quickly without panicking. Turn the device off, skip the rice and heat, keep it off the charger, and get help before a small exposure becomes a full device failure.

  • How to Transfer Phone Data Without Losing Anything

    How to Transfer Phone Data Without Losing Anything

    A new phone should feel like an upgrade, not a panic attack when your photos, messages, banking apps, and contacts are still on the old one. Knowing how to transfer phone data before you start can save you from missing files, duplicate contacts, and a long night trying to remember passwords.

    Most transfers are straightforward when both phones turn on and connect to Wi-Fi. The situation changes when the old device has a cracked screen, weak battery, charging problem, or water damage. In those cases, protect what is still accessible first, then decide whether a direct transfer, cloud backup, or hands-on help makes the most sense.

    Before You Transfer Phone Data, Do These Checks

    Do not wipe, trade in, or reset the old phone yet. Keep it powered on until you have checked the new device and confirmed that your important information arrived.

    Charge both phones to at least 50 percent, or leave them plugged in during the transfer. A large photo library, years of text messages, and downloaded apps can take a while. A transfer that stops because one phone dies can leave you unsure of what copied and what did not.

    You should also make sure you know the password for the account tied to the old phone. For an iPhone, that usually means the Apple Account password. For Android, it is normally the Google account password, though Samsung users may also need their Samsung account information. These passwords matter for restoring backups, downloading purchases, and removing activation locks later.

    Check available storage on the new phone before moving everything. If your old phone has 200 GB of photos and videos but the new one has 128 GB of storage, a full direct transfer may not fit. In that case, moving your files to cloud storage or selecting only what you need may be the better choice.

    Finally, take a few minutes to make a fresh backup if the old phone still works. A backup gives you another path if the transfer fails halfway through.

    How to Transfer Phone Data From iPhone to iPhone

    The simplest option is Apple’s direct setup process, often called Quick Start. Put the two iPhones near each other, turn on the new phone, and follow the setup prompt that appears on the old one. You will be asked to scan an animation and confirm your Apple Account.

    Choose the option to transfer directly from the old iPhone when both devices are working well. Keep them close together, connected to power, and on Wi-Fi until the process finishes. The new phone can bring over settings, photos, messages, apps, accounts, and much of your device setup.

    You can also restore an iPhone from an iCloud backup. This is useful if the old phone is unavailable but you have a recent backup saved online. During setup, select the restore-from-backup option and sign in with the same Apple Account. The phone may be usable before every photo and app finishes downloading, so give it time to complete on Wi-Fi.

    A computer backup is another option, especially if you do not have enough cloud storage. Back up the old iPhone to a Mac or PC, then restore that backup to the new iPhone. An encrypted computer backup can carry over more sensitive information, including saved passwords and health data, if you remember the backup password.

    How to Transfer Phone Data From Android to Android

    Many Android phones guide you through data transfer the first time you turn them on. During setup, select the option to copy apps and data from your old phone. Depending on the devices, you can use a USB cable, a wireless connection, or a Google backup.

    A cable transfer is often faster and more complete, particularly for a large number of photos and videos. Use a quality cable that fits both devices or the adapter included with the new phone. Follow the on-screen prompts and select what you want to copy, such as contacts, text messages, call history, photos, apps, and device settings.

    If you are restoring from Google, sign in to the same Google account during new-phone setup. Your contacts, calendar, many apps, and backed-up settings can return automatically. Photos may appear through Google Photos if they were backed up there, but they might not all be stored directly on the new phone unless you download them.

    Some manufacturers offer their own transfer tools. Samsung Smart Switch, for example, can move content from many Android phones and iPhones to a Samsung device. These tools can be helpful, but they do not always transfer every app setting or every login. Plan to sign in to some apps again.

    Moving Data Between iPhone and Android

    Switching platforms takes a little more attention because iPhone and Android handle messages, cloud storage, and apps differently. Start the new phone’s setup process before you begin using it. If you already completed setup, you may need to reset the new device to access the full transfer options.

    When moving from iPhone to Android, use the setup instructions on the new Android phone. A cable connection is usually the most reliable method. You may be able to copy contacts, photos, videos, calendar items, and some messages. If you use iMessage, turn it off on the old iPhone after your transfer is complete. If you skip this step, text messages from other iPhone users may keep going to your old device instead of your new phone.

    When moving from Android to iPhone, use Apple’s Move to iOS process during iPhone setup. Keep both phones plugged in and connected to the same Wi-Fi network if possible. It can transfer contacts, message history, camera photos and videos, mail accounts, calendars, and some free apps that are available in Apple’s App Store.

    Expect a few differences. Paid apps may need to be purchased again if they are not available across both platforms. App-specific data does not always transfer. Banking apps, authenticator apps, and secure work apps commonly require a fresh sign-in and identity check.

    Do Not Forget These Important Items

    Your photos are usually the first concern, but they are not the only data that matters. Before you erase the old phone, open the new one and check your contacts, recent messages, photo library, notes, calendar, and email accounts.

    Pay close attention to authentication apps. If you use an app that creates one-time security codes for email, work, social media, or financial accounts, transfer or back up those codes correctly before resetting the old phone. Some authenticator apps have their own export process. Others require you to sign in and set them up again account by account.

    Also check your payment cards, digital wallet, eSIM, and carrier service. Payment cards generally need to be added again for security. eSIM activation varies by carrier and phone model. Sometimes it transfers automatically during setup, while other times you will need a carrier QR code or help from your provider.

    If you use WhatsApp or another messaging service with its own backup system, confirm that chat history has been backed up inside that app. A phone-to-phone transfer may move it, but do not assume it will. Open the app on the new phone and verify your conversations before removing it from the old one.

    When the Old Phone Is Broken

    A broken phone does not always mean your data is gone. If the phone powers on but the screen is cracked or unresponsive, there may still be a way to connect it, unlock it, back it up, or transfer data directly. The key issue is whether you can unlock the device. Modern phones encrypt personal data, so a repair shop cannot simply bypass your passcode to pull information from it.

    If the display is visible but touch is failing, a temporary screen repair may be the practical first step. If the charging port is damaged, restoring power safely may be enough to complete a backup. Water damage is more urgent. Do not keep charging a wet device or repeatedly try to turn it on, since that can make damage worse.

    For Richmond customers dealing with a damaged phone and an urgent data move, Excell Wireless VA can assess the device and explain the realistic options. Bring the old phone, the new phone if you have it, and any passwords or account details you may need.

    Verify Everything Before Erasing the Old Phone

    Once the transfer looks finished, make a few calls, send a test text, open your photos, and sign in to your essential apps. Check that your phone number works on the new device and that voicemail is set up. If possible, wait a day or two before wiping the old phone. You may notice a missing note, document, or app after using the new phone normally.

    Only after you have verified the transfer should you sign out of accounts, remove your payment cards, disable any device-finding feature as required, and factory reset the old phone. That final check is what turns a data transfer from “probably fine” into a phone switch you can trust.

  • DIY Versus Professional Repair: When to Call

    DIY Versus Professional Repair: When to Call

    A cracked screen can make anyone reach for a repair kit. A phone that will not charge can make a cleaning video look like the fastest answer. But DIY versus professional repair is not only about saving money. It is about knowing whether a small problem is actually small – and whether a mistake could cost you the device, your data, or more time without your phone.

    For some issues, a careful at-home check is reasonable. For others, opening the device or forcing a fix can turn a repairable problem into a bigger one. The right choice depends on what is wrong, what tools are required, and how much you rely on that device every day.

    DIY Versus Professional Repair: Start With the Risk

    The easiest way to make the call is to look at the downside. If a DIY attempt fails, can you simply try something else? Or could it damage the screen, battery, charging port, camera, water resistance, or internal cables?

    Restarting a frozen phone, checking for a software update, removing a case that blocks a charging connection, or testing another cable are low-risk steps. They do not require special tools or putting pressure on delicate components. Backing up your data before you try anything is also smart, especially if the device has begun restarting, overheating, or showing storage errors.

    Opening a phone, tablet, game console, laptop, or smartwatch is different. Modern electronics are tightly packed. Screens are often glued in place, batteries may be secured with strong adhesive, and small flex cables can tear easily. A repair that looks simple in a short video may depend on heat control, exact replacement parts, adhesives, drivers, and experience recognizing what is actually broken.

    A good rule is simple: if the job requires you to pry, heat, solder, disconnect a battery, or remove a glued screen, professional help is usually the safer move.

    When a DIY Fix Makes Sense

    DIY troubleshooting can save time when you stay within basic, non-invasive checks. Start with the obvious causes before assuming a part has failed. Many charging complaints, for example, come from a worn cable, a weak adapter, debris in the port, or a power outlet that is not working.

    If your phone is slow, close unused apps, free up storage, restart it, and check for software updates. If the speaker sounds muffled, remove the case and make sure the opening is clear. If Bluetooth will not connect, forget the accessory and pair it again. These steps are practical because they can solve common problems without putting the device at risk.

    You can also handle basic accessory replacement when there is no need to open the device. Replacing a charging cable, power adapter, screen protector, or phone case does not involve sensitive internal parts.

    Even then, pay attention to warning signs. Stop troubleshooting if the device gets unusually hot, smells burnt, swells, has visible liquid inside the camera, repeatedly powers off, or shows a damaged battery. Do not keep charging a device with a swollen battery or try to press the screen back into place. Those are not convenience issues. They can become safety issues.

    Repairs That Usually Need a Professional

    Some problems may have one visible symptom but several possible causes. A phone that will not charge could have a damaged port, weak battery, failed charging circuit, liquid damage, a software fault, or a bad cable. Replacing the port without testing the device first may waste money and leave the original problem untouched.

    Broken screens and display problems

    A cracked screen is not always just cracked glass. Touch response, display brightness, face recognition components, cameras, and seals around the frame can all be affected. If the display has black spots, colored lines, flickering, ghost touches, or no picture at all, the damage may go beyond the top glass.

    Screen replacement also requires careful removal and reassembly. Poor-quality parts can create touch issues, weak brightness, or poor color. A professional repair gives you a clearer answer about what needs to be replaced before you spend money on parts.

    Charging ports and power failures

    It is fine to inspect a charging port with a light and try a known-good cable. It is not a good idea to dig aggressively with metal tools or force a connector into place. Pins inside the port are small and easy to bend.

    Power issues deserve extra caution. A device that only charges at a certain angle, loses power quickly, or will not turn on may need a port repair, battery replacement, or board-level diagnosis. Testing comes before replacing parts.

    Water damage

    Water damage is one of the clearest cases for prompt professional help. Do not keep trying to turn the device on. Do not charge it, and do not rely on rice as a repair method. Moisture can remain inside the device, corrode components, and cause failures days later.

    Power the device off if you can do so safely, remove the case, and get it checked as soon as possible. Fast action can make a real difference.

    Battery swelling and overheating

    A battery that lifts the screen, separates the back cover, overheats during normal use, or drains unusually fast needs attention. Batteries are not a part to puncture, bend, or pry out without proper tools and handling.

    Professional service helps identify whether the battery is the only issue or whether heat, charging trouble, or internal damage caused the problem. It also helps ensure the old battery is handled properly.

    The Real Cost Is More Than the Part

    DIY repair kits can look inexpensive until you add the right tools, replacement parts, adhesives, shipping time, and the chance of needing a second repair. That does not mean DIY is always a bad value. It means the price of a part is not the full price of the job.

    Time matters too. If your phone holds your work contacts, banking access, family photos, school information, two-factor login codes, and appointments, being without it for several days can cost more than the repair itself. A local repair shop may be able to diagnose the issue faster than a trial-and-error approach at home.

    There is also the question of repair quality. A cheap replacement screen that dims quickly or a battery that performs poorly can create another problem soon after the first one. The best option is not automatically the lowest upfront price. It is the option that gets your device working reliably again.

    Before You Approve Any Repair

    Whether you try a simple fix or bring the device in, protect your information first. Back up the device if it still works. Remove any sensitive items you do not need to leave behind, and know your passcode if testing after the repair will require it.

    Ask what the diagnosis found, what part is being replaced, and whether the quoted work addresses the full issue. If a device has multiple problems – such as a cracked screen, weak battery, and charging failure – a clear explanation helps you decide which repairs are worth doing now.

    It can also help to think about the age and condition of the device. Repair is often a practical choice when the device otherwise meets your needs. If it has severe internal damage, repeated failures, or an older battery and screen at the same time, compare the repair cost with the value you will get from keeping it in service.

    Get a Clear Answer Before You Take It Apart

    You do not need to be an electronics expert to know when something is wrong. What you need is a safe next step. Start with basic troubleshooting for simple software and accessory issues. For physical damage, charging failures, battery concerns, water exposure, or anything that requires opening the device, get a diagnosis before ordering parts.

    At Excell Wireless VA, customers in Richmond can bring in a phone or other personal device, explain the issue, and get straightforward service guidance. A quick quote request or call can help you decide whether repair makes sense before a small problem becomes a more expensive one.

    Your device does a lot of work for you every day. When it starts failing, choose the fix that protects your time, your data, and the device itself.

  • Authorized Versus Independent Repair Compared

    Authorized Versus Independent Repair Compared

    A cracked phone screen can turn into a bigger decision than expected. Authorized versus independent repair affects more than where you take your device. It can affect the price, turnaround time, available parts, warranty options, and whether you can get help for an older or less common device.

    For most people, the right choice comes down to the problem in front of them. A phone still covered by a manufacturer warranty has different needs than a two-year-old device with a broken charging port. Here is how to compare your options without getting stuck in a long support process when you need your device back.

    What authorized repair means

    An authorized repair provider is approved by a device manufacturer to perform certain repairs. Depending on the brand and program, the provider may use manufacturer-supplied parts, follow brand-specific repair procedures, and have access to diagnostic software or calibration tools.

    This can be a good fit when your device has an active manufacturer warranty, a protection plan, or a repair issue that the manufacturer has agreed to cover. An authorized provider may also be required for certain warranty claims. If the repair is covered, you may pay little or nothing beyond a deductible, depending on your plan.

    There can be limits, though. Authorized locations generally work within the manufacturer’s policies. They may only service supported models, offer a set list of repair types, require an appointment, or send the device away for service. In some cases, a manufacturer process results in a replacement device instead of a repair to the exact phone you brought in.

    That is not automatically a bad thing. It just means you should ask what will happen before you hand over your device, especially if you have data, photos, authentication apps, or business files stored on it.

    What independent repair means

    An independent repair shop is not affiliated with a device manufacturer. It can diagnose and repair a wide range of phones, tablets, laptops, game consoles, and other personal electronics, often across multiple brands.

    The main advantage is flexibility. An independent technician can look at the actual issue and discuss practical repair options. If your phone will not charge, for example, the cause could be debris in the port, a worn charging port, a battery problem, a damaged cable, or a board-level issue. A local shop can help narrow that down instead of treating every problem as a replacement case.

    Independent repair is often a strong option for devices that are out of warranty, have accidental damage, are older, or do not qualify for manufacturer service. It can also be more convenient when you need a local answer quickly rather than mailing your device away or waiting for a manufacturer appointment.

    Part availability varies by model and repair type. A dependable independent shop should explain the part options available, the expected repair outcome, price, and any shop warranty before work begins. There is no one-size-fits-all answer, and clear information matters more than a vague promise.

    Authorized versus independent repair: the differences that matter

    The best comparison is not simply official versus unofficial. It is about what you need from the repair.

    Warranty and protection plans

    Start here if your device is newer. Check whether it is still under the manufacturer’s limited warranty or covered by a protection plan. A warranty may cover a defect, but it usually does not cover accidental screen damage, liquid damage, loss, or normal wear unless you have additional coverage.

    Before choosing any repair, read the terms of your plan or contact the manufacturer. Ask whether outside repair affects existing coverage and whether your specific issue is eligible for authorized service. Rules can differ by brand, model, region, and type of damage.

    If there is no active coverage, an independent repair quote may make more financial sense. You are no longer comparing a covered claim to a paid repair. You are comparing the actual cost, timing, and value of getting your device working again.

    Cost and repair value

    Authorized pricing can be predictable, particularly for common repairs on current devices. But predictable does not always mean lower. Manufacturer service may charge a flat rate, require a deductible, or recommend replacement when repair is not offered through its program.

    Independent shops can often provide a quote based on the problem and model. This is especially useful when you are deciding whether a repair is worth it. Replacing a charging port, battery, or screen may be far less expensive than buying a new phone. On the other hand, extensive liquid damage or serious motherboard damage may not be the best use of your money on an older device.

    Ask for the complete estimate. Find out whether diagnostic fees apply, whether the estimate changes if more damage is found, and whether the repair has a warranty. A low starting price means little if it does not include the work your device actually needs.

    Speed and convenience

    People rarely plan for a broken phone. You need your maps, banking apps, work messages, school accounts, and family contacts now.

    An authorized route may involve scheduling, shipping, waiting for an assessment, or following a claim process. That can be reasonable for a covered repair or a complex issue tied to the manufacturer. Still, it may not be the fastest route for every problem.

    A local independent shop can be more direct. You can describe the issue, get a quote, bring the device in, and speak with someone who can assess it. At Excell Wireless VA, the goal is straightforward: bring in the device and explain the problem, whether it is a cracked screen, power issue, charging failure, speaker trouble, or something less obvious.

    Turnaround depends on the model, part availability, and damage. Be cautious of anyone who guarantees a repair time before inspecting the device. Fast service is useful, but an accurate diagnosis is what keeps a small problem from becoming a repeat repair.

    Parts, tools, and repair quality

    Parts are a reasonable question, not an awkward one. Screens, batteries, cameras, charging ports, and other components can vary in source and quality. Some repairs require calibration or software checks after installation. Some models have components that are harder to source than others.

    Authorized providers may use manufacturer parts under the terms of their program. Independent shops may offer different parts options based on availability, device age, performance needs, and budget. Ask what part will be used and what to expect after the repair. For a screen, ask about display quality and touch response. For a battery, ask about expected performance. For a charging issue, ask whether the port was tested with multiple cables and power sources.

    Quality also includes the diagnosis. Replacing a battery will not fix a device that is failing because of liquid corrosion or a damaged charging circuit. A good technician explains the likely cause, the repair path, and the uncertainty when there is one.

    Questions to ask before you choose

    You do not need to become a repair expert before getting help. A few direct questions can prevent surprises:

    • Is my device still covered by a manufacturer warranty or protection plan?
    • Is the issue likely covered, or is it accidental damage?
    • What is the full repair estimate, including diagnosis and parts?
    • What type of part will be used, and what warranty comes with the repair?
    • How long is the expected turnaround after the device is inspected?
    • Will the repair affect my data, settings, water resistance, or existing coverage?

    Back up your device if you can before any repair. If the screen still works, save photos and important files, make sure you know your passcode, and remove account locks only when the repair provider explains why it is needed. Never share your passwords. A reputable shop should not need them for a standard hardware repair.

    Choose based on the device and the problem

    Use authorized service when an active warranty or protection plan gives you a clear advantage, or when the manufacturer requires its repair channel for your specific claim. It may also be the right move for certain highly specialized repairs on newer models.

    Choose an independent repair shop when your device is out of warranty, you need fast local support, you want options across brands, or you need a practical assessment before spending money. This route can be especially helpful for common issues such as screens, batteries, charging problems, buttons, cameras, speakers, and troubleshooting that does not fit neatly into a manufacturer claim.

    The best next step is simple: describe what your device is doing, share the model if you know it, and ask for a clear quote. A useful repair decision starts with an honest diagnosis, not pressure to repair or replace before you understand the problem.

  • Phone Repair Reviews: What to Check First

    Phone Repair Reviews: What to Check First

    A cracked screen is annoying. A phone that will not charge, will not turn on, or keeps dropping calls can stop your whole day. That is why phone repair reviews matter before you hand over a device full of photos, passwords, work messages, and payment apps. The goal is not to find a shop with a perfect star rating. It is to find one that has a track record of handling problems like yours clearly and professionally.

    A good review can tell you whether a repair shop communicates well, explains the likely issue, and follows through after the repair. Read enough of them, and you can spot the difference between a business that simply gets devices through the door and one that helps customers get back to normal.

    What Reliable Phone Repair Reviews Actually Tell You

    Start with the details, not the number of stars. A five-star rating is a good sign, but the written comments give you the useful information. Look for customers describing the device, the problem, and what happened after they brought it in.

    For example, a review saying, “They fixed my iPhone screen” is positive but limited. A review saying the shop diagnosed a charging problem, gave a price before starting work, and explained why the phone was not charging is much more helpful. It shows the customer understood the service and felt informed throughout the process.

    Pay attention to whether reviewers mention responsiveness. When your phone is your alarm, map, work tool, and connection to family, waiting days for a basic answer is frustrating. Reviews that mention quick replies, clear updates, and an easy drop-off process usually point to a shop that respects customers’ time.

    Recent reviews deserve the most weight. A business may have earned great feedback several years ago, but current comments better reflect its staff, repair process, turnaround expectations, and parts availability today. Read reviews from the last few months along with the overall history.

    Look for Repair Details That Match Your Problem

    A phone repair shop may be excellent with screen replacements but have fewer reviews about water damage or data-related issues. That does not automatically make it the wrong choice. It simply means you should ask a few direct questions before approving the repair.

    Search reviews for words related to your issue, such as screen, battery, charging port, camera, speaker, software, water damage, or no power. If you have a Samsung, iPhone, Google Pixel, Motorola, or another model, see whether customers mention that brand as well. Independent repair businesses often support many devices, but parts and repair approaches can vary by model.

    How to Read Phone Repair Reviews Without Getting Misled

    Do not make a decision based on one glowing review or one angry review. Most repair shops will eventually receive a negative comment. Electronics can have hidden damage, replacement parts can fail, and some devices are too damaged to repair at a reasonable cost. What matters is the pattern.

    Read several reviews in a row and ask whether the same strengths or complaints appear repeatedly. If customers consistently praise fair communication and careful work, that is meaningful. If multiple people say they were surprised by the final price or could not get an update, treat that as a reason to ask more questions.

    Also consider how specific a negative review is. A short comment like “Terrible service” does not explain much. A detailed review may describe a real concern, but it can also reveal a situation where the customer expected a repair to solve unrelated damage. Phones often have more than one problem. A broken screen can hide frame damage, a charging issue can be caused by debris or a failing battery, and liquid exposure can create problems that show up later.

    A repair business should be willing to explain that uncertainty before it starts work. Honest diagnosis is better than a promise that sounds good but ignores the condition of the device.

    Watch for the Response, Not Just the Complaint

    When a business responds publicly to criticism, look at the tone. A useful response stays professional, addresses the concern, and invites the customer to resolve the issue. It should not blame the customer, argue over every detail, or make excuses.

    That said, a lack of public replies is not proof of poor service. Many local businesses focus on helping customers directly instead of spending time responding online. The bigger question is whether review after review suggests that customers can reach the shop, get answers, and receive help if something needs follow-up.

    Questions Reviews Cannot Answer for You

    Reviews are a starting point, not a diagnosis. Before you visit, contact the shop with a clear description of your device and the symptoms. Mention the make and model, when the problem began, whether it was dropped or exposed to water, and whether you have already tried a charger, cable, or restart.

    Ask whether the shop can inspect the device before giving a final repair recommendation. For a simple cracked screen, a quote may be straightforward. For a phone that will not power on, the cause could be the battery, charging port, display, internal connection, or board-level damage. The right repair depends on what the technician finds.

    It also helps to ask what is included in the quote. Is the price for parts and labor? Does the estimate change if additional damage is discovered? What happens if the device cannot be repaired? Direct answers prevent surprises and make it easier to compare local options fairly.

    If your data is especially important, say so upfront. A repair may require testing, restarting, or replacing a component. Back up your phone when possible before dropping it off, and ask what precautions the shop recommends for your specific issue. No repair shop should casually promise that every photo or file can be recovered from a phone with severe internal damage.

    Good Signs for Common Phone Repairs

    For screen repair, reviews should mention clean installation, responsive touch function, and a display that looks right after the repair. Price matters, but the lowest quote is not always the best value if the screen quality, fit, or touch response is poor.

    For battery problems, look for comments about improved battery life, reliable charging, and clear advice about whether a battery replacement made sense. Some battery complaints are actually caused by heavy app use, software issues, or charging accessories. A shop that takes time to identify the cause can save you from paying for the wrong repair.

    For charging issues, strong reviews often mention careful diagnosis. A phone may need cleaning, a port repair, a new battery, or a different charging cable. Do not assume the charging port is broken just because the cable will not stay in place.

    For water damage and no-power issues, realistic communication matters most. These repairs are more unpredictable than a screen replacement. Look for a shop that explains possible outcomes and does not pressure you into an expensive repair without discussing the condition of the device.

    Use Reviews to Start a Better Repair Conversation

    The best use of reviews is simple: narrow your options, then contact the shop that appears capable, responsive, and clear. Tell them what you read that gave you confidence, then ask about your own phone. A local shop should be able to tell you the next practical step, whether that is bringing it in for inspection, requesting a quote, or trying a basic troubleshooting step first.

    For Richmond customers, Excell Wireless VA offers help with many device problems under one roof. Bring the details of your issue, ask for guidance, and get a clear idea of what repair may involve before you decide.

    Your phone does not need to stay broken while you sort through vague ratings. Read the details, ask direct questions, and choose the repair shop that gives you a straightforward answer.

  • How to Resolve Phone Boot Loop Problems Safely

    How to Resolve Phone Boot Loop Problems Safely

    Your phone shows the logo, starts to load, then shuts down and repeats. Calls, messages, banking apps, photos, and work access are suddenly out of reach. If you need to resolve phone boot loop trouble, start with the safest checks first. A boot loop can come from a bad update, low battery power, damaged hardware, storage trouble, or a failing part inside the phone.

    The goal is not to keep pressing buttons until something changes. The goal is to avoid making the problem worse or erasing data before you know what caused it.

    What a phone boot loop usually means

    A boot loop happens when a phone cannot complete its startup process. It powers on, reaches the manufacturer logo or loading screen, then restarts before the home screen appears. Some phones loop every few seconds. Others may stay on the logo for several minutes before restarting.

    Software is often the first suspect, especially if the problem began after an update, a new app, a storage warning, or the phone unexpectedly shut off. But hardware can cause the same behavior. A weak battery may not provide enough power during startup. Water exposure, a hard drop, a damaged charging port, or a failing power button can also keep a phone from booting normally.

    That difference matters. Reinstalling software will not fix a loose battery connection or a damaged charging circuit. Replacing a battery will not fix corrupted system files. A proper diagnosis saves time, money, and possible data loss.

    Safe first steps to resolve phone boot loop issues

    Before attempting a reset, remove the phone case and unplug accessories. Take out the charging cable, headphones, USB adapters, and removable storage cards if your phone has one. A damaged cable, faulty accessory, or stuck side button can interfere with startup.

    Next, connect the phone to a known-good wall charger using a cable you trust. Let it charge for at least 30 minutes without repeatedly trying to turn it on. A phone that was deeply drained can act like it is in a boot loop when the battery cannot hold enough charge to finish starting up.

    After charging, perform one force restart. The button combination depends on the model. On many newer iPhones, this involves quickly pressing the volume buttons in sequence and then holding the side button. Many Android phones use the power button and volume down button. Check your device’s official button sequence if you are unsure, and try it once or twice rather than holding random buttons repeatedly.

    If the phone starts, do not assume the issue is gone. Back up important photos, contacts, and files right away. Then check available storage, remove any recently installed app that seems suspicious, and install pending system updates only after the phone is stable.

    Look for the clue that came before the loop

    Think about what happened just before the phone stopped working. Did it fall? Get wet? Overheat in a car? Run out of storage? Shut down during an update? Did the battery begin draining unusually fast in the days before the issue?

    A phone that started looping after a drop or water exposure needs a hardware inspection. Trying resets over and over may not help. A phone that loops immediately after a system update may have software corruption, but it can still have an underlying battery or storage issue that appeared at the same time.

    If the phone feels hot, smells unusual, has a lifting screen, or shows signs of a swollen battery, stop charging and stop using it. Keep it on a nonflammable surface and have it inspected. Battery swelling is not a do-it-yourself repair.

    Recovery mode can help, but it carries risk

    If a force restart does not work, recovery mode may offer more options. This is a special startup screen that can help a computer recognize the device, reinstall its operating system, or sometimes clear temporary system files.

    For iPhones, a computer may offer an update option before a full restore. An update attempts to reinstall iOS without erasing personal data, though it is not guaranteed to succeed. A restore erases the device and reinstalls the operating system. That can get the phone working again, but it should not be the first move if your photos and files are not backed up.

    On many Android devices, recovery mode may include options such as restarting the system, entering safe mode, or wiping a cache partition. Not every Android model has the same menu, and some newer devices do not offer a cache-wipe option. Avoid selecting “wipe data,” “factory reset,” or similarly worded commands unless you understand that the phone may erase everything stored locally.

    This is where many people lose data unnecessarily. A factory reset can fix certain software boot loops, but it cannot repair physical damage, a failing battery, or a bad charging component. If the reset fails, you may be left with the same problem and no data.

    When the problem is likely hardware

    Hardware-related boot loops often come with other symptoms. The phone may restart when the charging cable moves, only boot when plugged in, shut down at a certain battery percentage, get unusually warm, or fail after a cracked-screen repair or drop.

    Battery failure is a common cause, particularly on older phones. The phone may show a charge percentage, yet the battery voltage drops too low under the heavy demand of startup. A damaged power button can also send repeated signals that cause restarts. Internal board damage is less common, but it is possible after water exposure, impact, or an unsuccessful repair attempt.

    Storage failure can sit between software and hardware. When internal storage is damaged or completely full, the operating system may not be able to load normally. The phone can appear to have a simple software problem, while updates and resets repeatedly fail.

    A technician can test the charging path, battery behavior, buttons, display connections, and other components before recommending a repair. That is usually a better next step when the loop began after physical damage or when basic software recovery has not worked.

    Protect your data while you troubleshoot

    If the phone stays on long enough to reach the lock screen, make data protection your first priority. Connect to Wi-Fi, back up photos and contacts, and copy critical documents if possible. Do not wait until the phone loops again.

    Avoid third-party “one-click repair” programs that promise to fix every boot issue. Some require payment before revealing whether they can help, and many rely on reinstalling software that may erase your data. They also cannot diagnose a bad battery, liquid damage, or a failing internal component.

    If the device asks for an Apple Account, Google account, passcode, or screen lock after recovery, use the correct account details. Security locks are designed to protect the owner. No legitimate repair shop should promise to bypass them.

    Get the right repair before choosing a reset

    A boot loop is frustrating because the cause is not always visible. If your phone still loops after charging, a force restart, and a careful recovery attempt, do not keep cycling through resets. Bring it in with the charger you normally use and explain what happened before the problem started. Those details can point to the real issue faster.

    For Richmond customers, Excell Wireless VA can inspect phones across major brands and help determine whether you are dealing with a software problem, battery issue, charging fault, or damage that needs repair. A quick diagnosis can prevent you from paying for the wrong fix or wiping data when another repair may get the phone running again.

    Your phone does not need to stay stuck on a logo screen. Take the safe steps, protect your data when you can, and get a hands-on diagnosis when the loop does not stop.